
**UPDATE**
We easily retrofitted this platform for our 5th generation 4Runner and will try to get some pics/ dimensions posted!
**ORIGINAL POST**
With a 10 day Colorado road trip looming and an early 2017 three-week epic family adventure in the planning stages, Molly and I thought it might be a cool idea to turn our 4th generation 2005 Toyota 4Runner into an off-road camping machine. In the past, we have driven by countless picturesque backcountry campsites near and on 4WD roads and thought about how nice it would be to stay at them – all the conveniences of car camping without any of the crowds!
After checking out some well thought out ideas online (1, 2), we drew up some rough plans and the build began… well, sort of. With summer in full swing and a VERY busy toddler running around, our first “build” got as far as a futon mattress in the back of the 4Runner and a cheap cargo net stretched across the ceiling for gear and fishing rod storage. We decided it would still be a good (read: free) way to test if we even liked sleeping in our vehicle before investing time and resources into doing a full build.
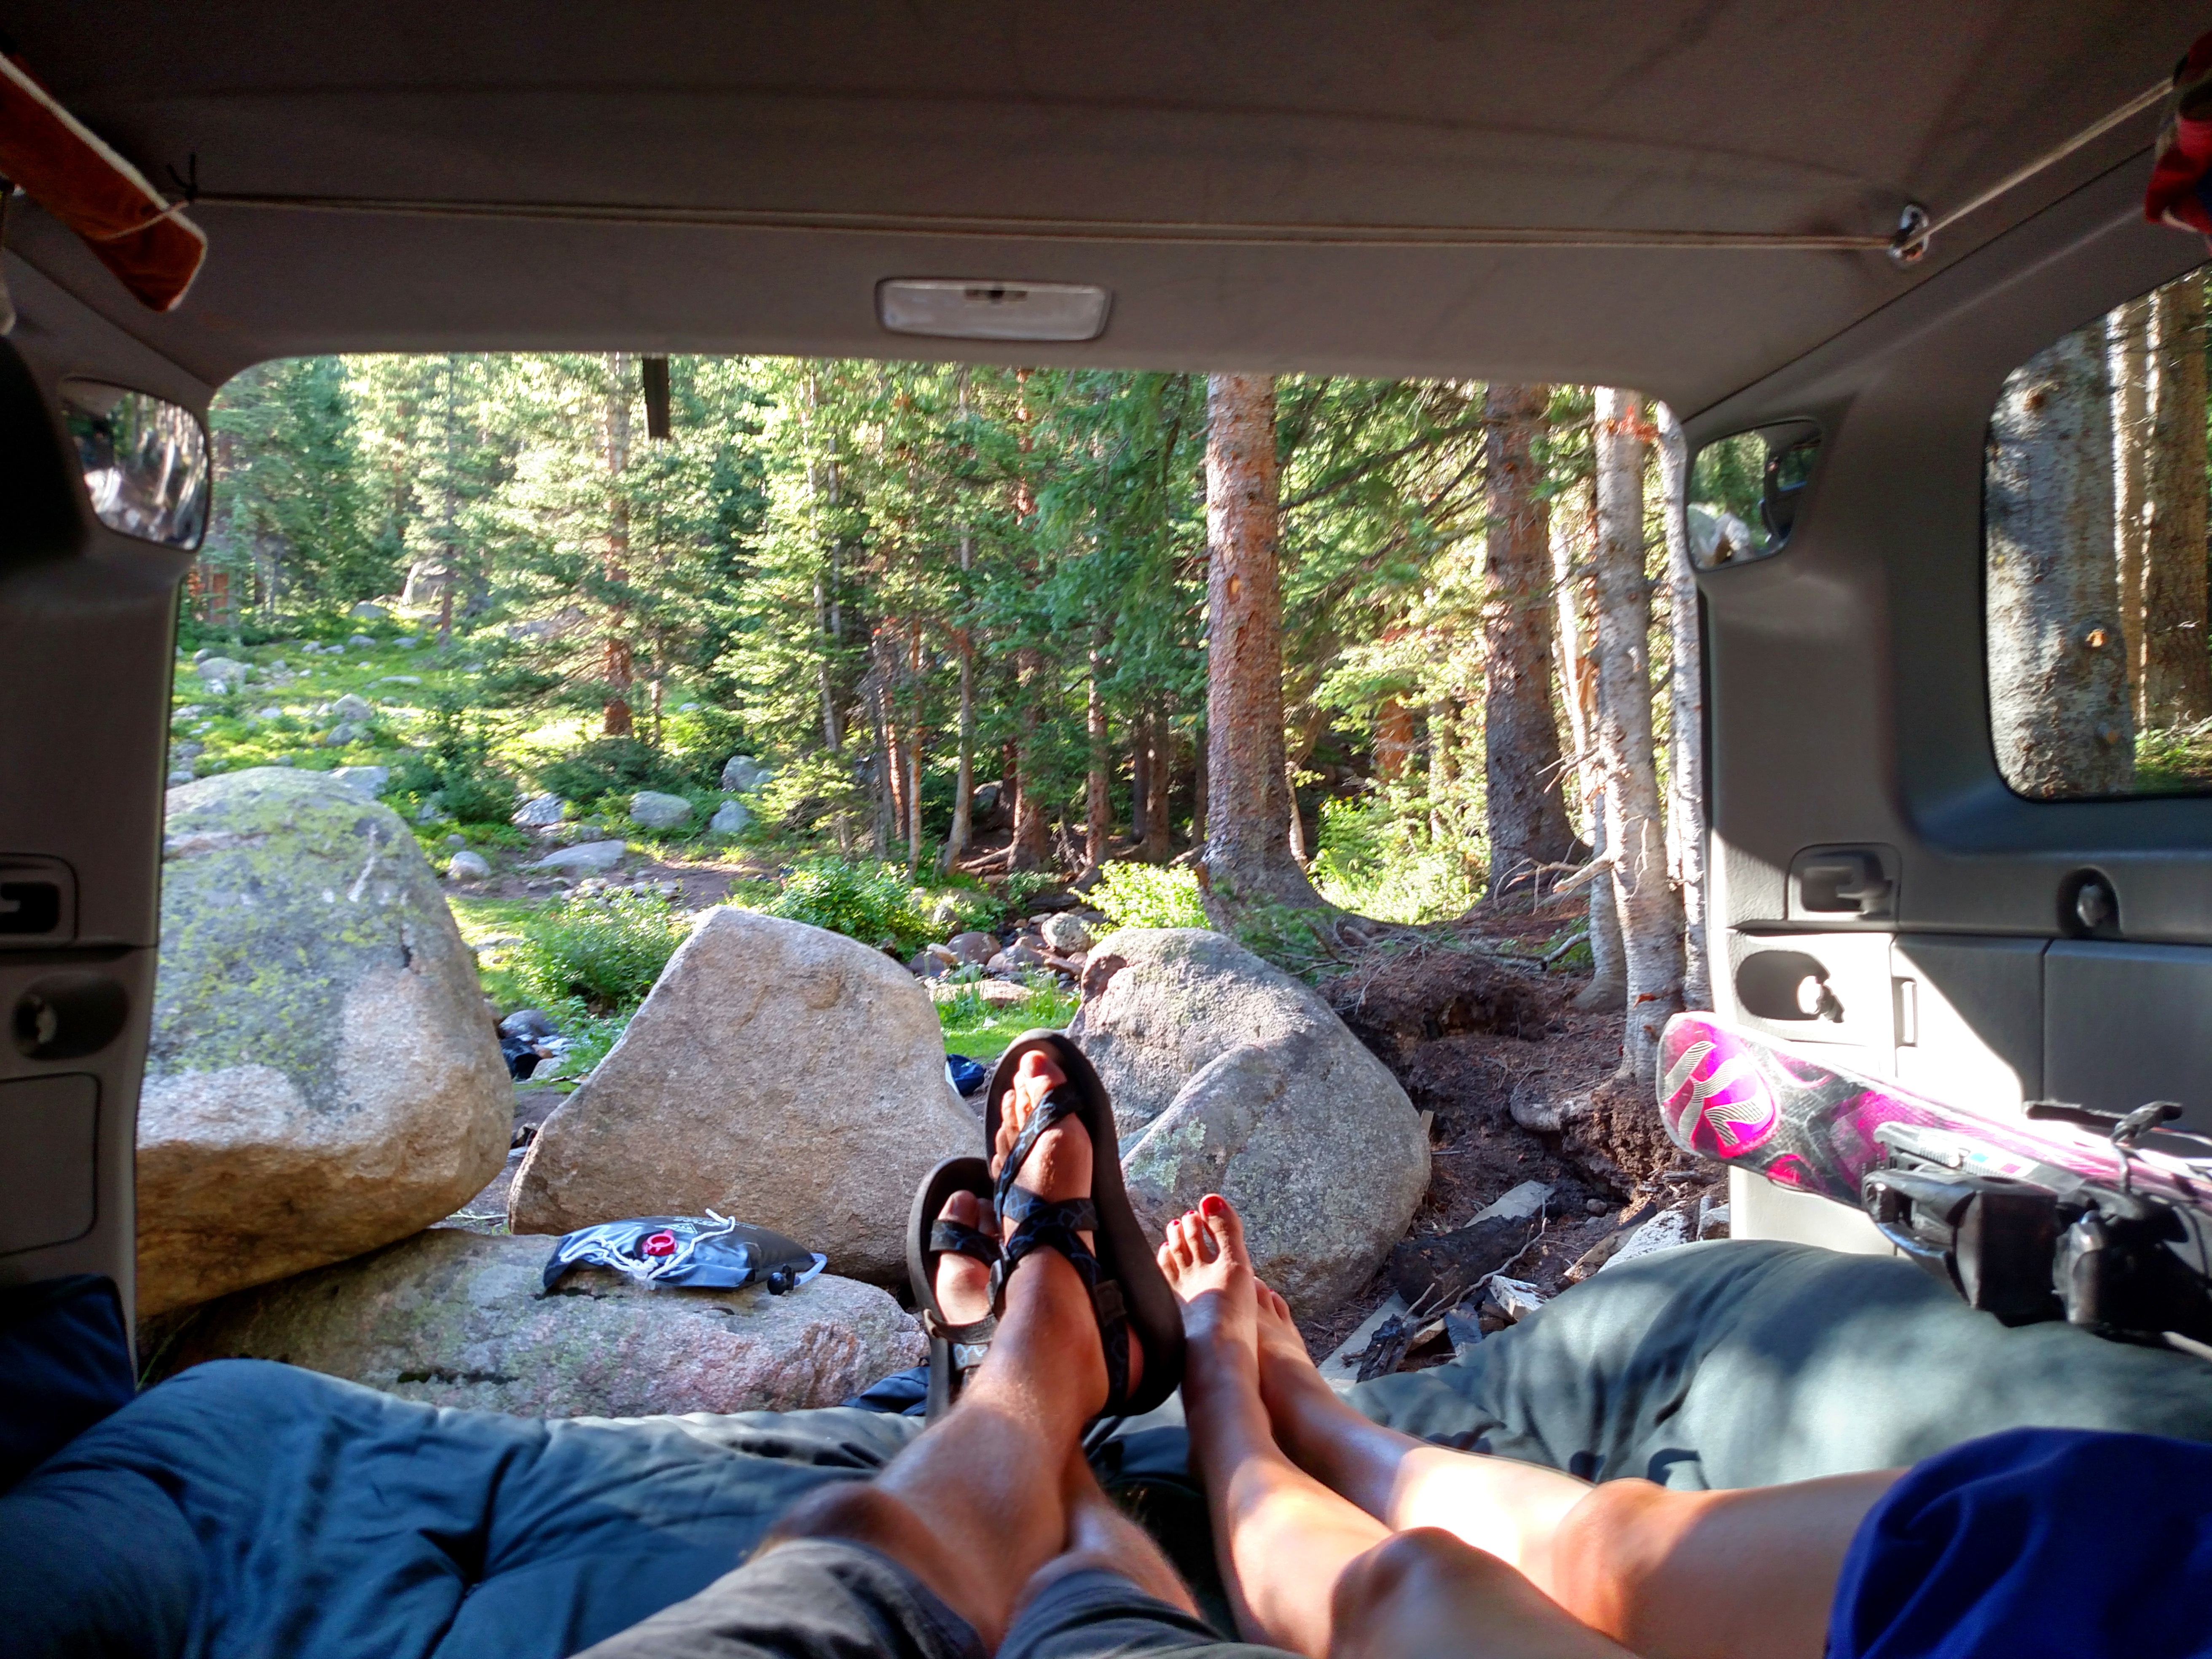
On our Steamboat Springs trip, we got an opportunity to see what the whole “van life” thing was about on our way from Steamboat to Denver. We drove up the 4WD County Road 202 in Arapahoe National Forest, found one of the plentiful camping spots, cooked dinner, piled our gear into the front seats and on top of the truck, and cozied with a book. On the drive east the following day, Molly and I both agreed that this version of camping was much faster, cheaper, and warmer than the tent option. The full build would commence!
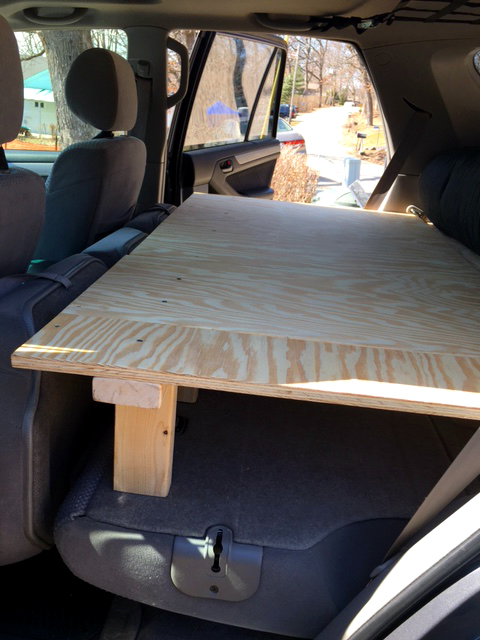
The following month, I roped my dad, an experienced woodworker and amateur engineer, into helping me build the platform. He came to the table with some nice improvements on my rough design and we knocked it out in about six hours. The platform is split as follows: laterally along the back seat, and longitudinally along the 60/40 split of the seats. We hoped this would allow for maximum versatility while still remaining stable enough to sleep on. See pictures, dimensioned sketches, and instructions (at bottom) for detailed info.


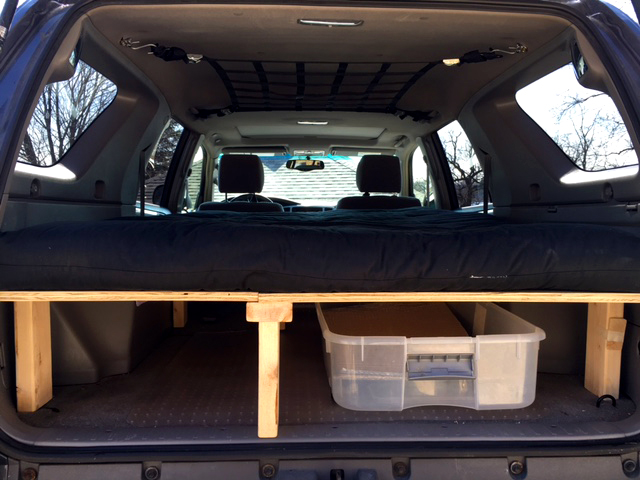


To provide insulation and privacy, we cut Reflectix to fit snugly into the rear windows of the SUV and even fashioned some netting to cover the rear window and sunroof for bug deterrence. We found using cardboard to template the windows before cutting into the Reflectix worked pretty well, but was also very time consuming. To affix the netting to the vehicle, we used a system of magnets and good old fashioned duck tape. The pictures show a Rubbermaid tub underneath for storage, which we found worked far better than our North Face Base Camp duffel bags (1 XL and 1 M). We bought a second tub for the left size which fit perfectly as well. Finally, we found a great cargo net available at Cabela’s, and rigged it up on the ceiling for extra gear storage. To see how well this system works for three weeks, look for upcoming posts from our epic road trip in May!
4Runner Camper Conversion Instructions
- Assemble tools and supplies already on-hand
- Go Shopping – see below
- Dimension cargo area
- Length front to back behind and in front of back seats
- Width of front seat area
- Width of front, max width, and back of cargo area
- Consider following 60/40 split of seats for easy removal, versatility
- Using dimensions gathered, sketch curved areas on the plywood sheet and draw a rough outline of the interior shape
- Cut and affix wheel well protection (not necessary, but didn’t want to scuff up the plastic)
- Cut plywood sheet – err on the larger size when in doubt!
- Cut supports and place in the truck at approximate locations
- Don’t forget to take into account the wheel well protection thickness
- Take Rubbermaid tub dimensions, 60/40 split into consideration when placing supports
- Place and fit plywood sheet into truck – use belt sander or jig saw if fit is too snug
- Mark optimal support leg locations, considering both optimal support and tub dimensions
- Remove plywood from truck, screw in support legs at marked locations
- Sand it all down thoroughly (OUTSIDE truck!!!!)
- Paint it (if desired)
- Fashion Reflextix privacy screens
- To dimension windows, roll window down, hold a piece of cardboard on the other side of the door, and trace the window outline onto the cardboard
- Cut Reflectix slightly larger than drawn dimensions to ensure a snug fit
- Fashion bug screens
- Using dimensions from step 13, cut screen a few inches larger to accommodate magnets
- Using duck tape, affix magnets to screen – make sure to check polarity!!
TOOLS NEEDED
| Tape measure |
| Square |
| Circular saw for straight cuts on plywood and supports (supports are better cut with mitre saw if you have one) |
| Sabre/Jig saw for curved cuts on plywood |
| Impact driver for deck screws (you could use a drill if you don’t have access to a driver) |
| Drill for pre-drilling (where needed) |
| Power sander – hand, orbital, belt – any of these work to varying degrees at certain points |
| Pencil for drawing on plywood |
| 4 foot level (substitute torpedo level and long straight edge if you don’t have a 4′) |
| Heavy duty shears for reflectix, screen |
| Large piece of cardboard to dimension windows |
| SHOPPING LIST | |||||||
| PHASE | |||||||
| ITEM | QTY | PRICE | SUB TTL | I | II | ||
| 3/4 inch plywood | 1 | $27.00 | $27.00 | x | |||
| 2″x4″, 8 FT (untreated) | 2 | $3.00 | $6.00 | x | |||
| 2″ deck screws (box) | 1 | $10.00 | $10.00 | x | |||
| Reflectix (roll) | 1 | $25.00 | $25.00 | x | |||
| Magnets (Amazon pack) | 1 | $15.00 | $15.00 | x | |||
| Duck Tape (roll) | 1 | $7.00 | $7.00 | x | |||
| Rubbermaid tubs | 2 | $10.00 | $20.00 | x | |||
| $110.00 | ESTIMATED COST | ||||||


New subscriber here. Cade and Molly I love this concept! Simple and efficient and maximizing your experiences! Also to do all this with a young family is awesome. Look forward to future posts.
LikeLiked by 1 person
Thanks for the kind words!
LikeLike
cool build out – love it!
LikeLike